|
|
|
|
|||
|
REACH Delivery - Manage User Groups
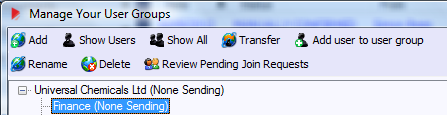
REACH Delivery allows for "User Groups" within a corporation to be defined. These groups can be considered to be sub-companies e.g. Holding company, Subsidiary company, country specific company etc or departments e.g. finance, compliance, warehouse, etc. It is completely up to the users of REACH Delivery as to how they wish to use "User Groups". If groups are defined then they can provide an automated distribution list capability. Further to this a support structure is required within a company. This requires the ability for a user to have a supervisor (in REACH Delivery this role is defined as the administrator). Each user is assigned an administrator when their account is created. The company area function also allows the concept of merging companies whereby the system administrator will be able to merge two companies by adding one company as an ‘area’ in another company. The "Manage User Groups" functionality displays the following screen, with the section showing (<company>) showing the full "tree" diagram for all the company areas.
The icons on the screen have the following functionality. Please click on the link to jump to a more detailed explanation of the function. Once you have added additional areas there are two further icons that appear on the screen.
Adds a new area under the area that is selected. When this icon is clicked you will be requested to enter the name for the new area:
when this is entered and the
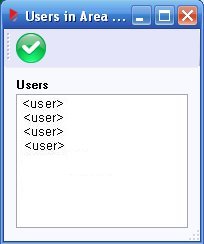
Shows a list of all the users that are currently assigned to a certain area but not those specifically in an area the is below (subordinate) to the area selected. Users are assigned to an area in the manage your public data menu option
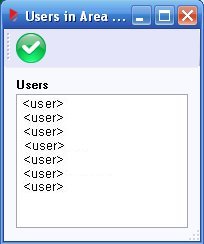
Show all users in this and all child areas Shows a list of all the users that are currently assigned to a certain area and any users that are in areas below (subordinate or child) areas. Users are assigned to an area in the manage your public data menu option
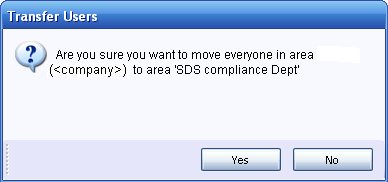
Transfer all users from this area
If you wish to transfer all users from one specific area
to another then select (by clicking on it) the area you
want to transfer from and then click the
When you have made your selection and clicked the
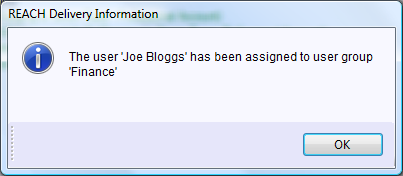
and finally a confirmation that the move has been completed is displayed:
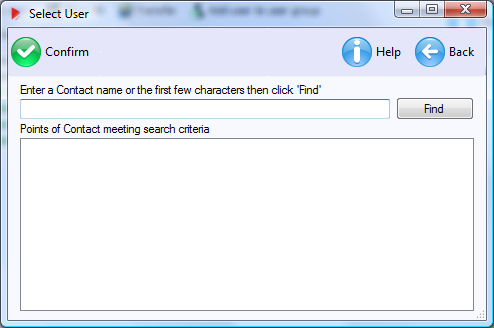
If you
wish to add a user to a user group, click on the
You will be presented with the following screen.
Select
the required user and click on the
If you wish to rename a specific area
then select (by clicking on it) the area you
want to rename and then click the
When you have typed in the new name click the
|
|||
|
REACH Delivery Service Copyright © All rights reserved. |
Additional Support: Contact REACH Delivery Support Marketing and Sales: Contact REACH Delivery | ||