|
|
|
|
|
|
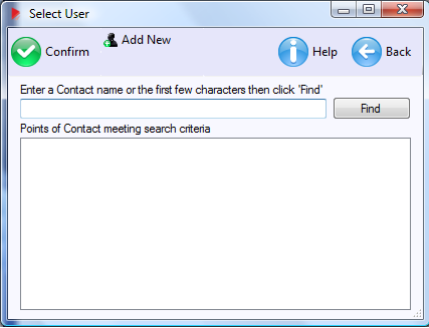
REACH Delivery - Manage Internal Users This is an Administrator only function available from the "Administrator Functions" menu. The manage points of contact function allows you to add or modify the internal users for your organisation in the REACH Delivery system. On the screen below you can either:
2.
Add a new point of contact (user) using the
Search for a user and modify their user details
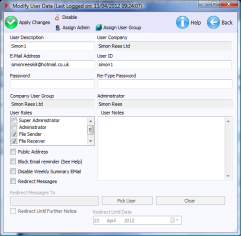
Modify Point of Contact When you double click on a user name to modify the user record for a Point of Contact (user) then the administrator has the same functionality to amend a point of contact (user) records as the point of contact has themselves in the manage your public data function on the option menu.
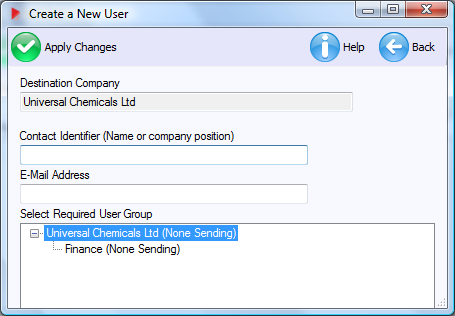
When you add a new point of contact then a new screen (as shown below) will be opened. If you are adding a new 'Point of Contact' to an existing company, then select the company using the 'Find' functionality. However if you are adding a new Company to the system, then just enter the company name in the "Destination Company" field without clicking the 'Find' button. Please note: If you do not have file sending capabilities (associated with your REACH Delivery login) then you will ONLY be able to add new points of contact within your own company.
You can see on the screen their userid and are also able to enter the initial password that you would like the new user to have.
When you have added the information
requested simply click the
What do the symbols mean? (click on the icon or the link to jump to information on that subject))
|
|
|
REACH Delivery Service Copyright © All rights reserved. |
Additional Support: Contact REACH Delivery Support Marketing and Sales: Contact REACH Delivery |


 NOTE:
This function is an administrator only function and
therefore if you are adding a user within your own
company the REACH Delivery system will assume that
you are the administrator for that user. For
security purposes, the new user will be pointed back to
you to get their username and password which you will be
able to set up by using the "find" feature of manage
points of contact (see description above) and then
double-clicking on the user name to bring up the "Modify
User Data" screen for the new user (shown here).