|
|
|
|
|
|
The Internal Distribute function allows you to distribute a file to users within your organisation. This function is accessed by clicking the icon (shown above) in a received message. The Internal Distribute function will send the specified file to the target user as a tracked distribution. This means that a message will be sent to the specified user and will appear in their "Outstanding Received Messages" list where they will need to "Accept" the message in the same way as they would on receipt of a message from an external company.
Adding a new internal user and activating them
Adding an internal point of contact and making sure that they are active
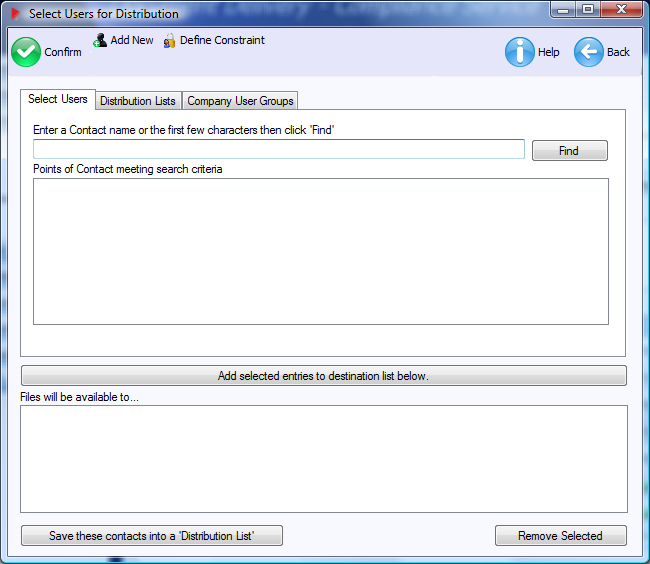
Distributing Files
You are not asked for a company for the point of contact as the distribute files function is for passing files/messages on within a company and therefore the users you select must be internal (part of your company).
If you cannot find the 'point of
contact' you wish to distribute the files to, you can
add them as long as you know their e-mail address.
To do this, click the 'Add new
point of contact' button
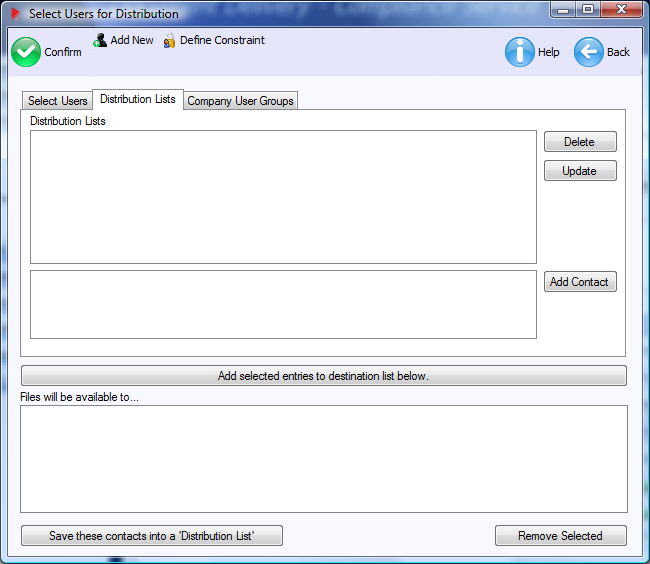
You can also create distribution lists that are saved and reused if you regularly send files on to the same group of people. To create a distribution list Simply click on the "Make these contact into a 'Distribution List'" button when you have selected the users that you want in the distribution list. You will be asked to name the distribution list and thereafter this can be accessed through the "Distribution Lists" tab. Click on the "distribution lists" tab and the following screen will be presented to you.
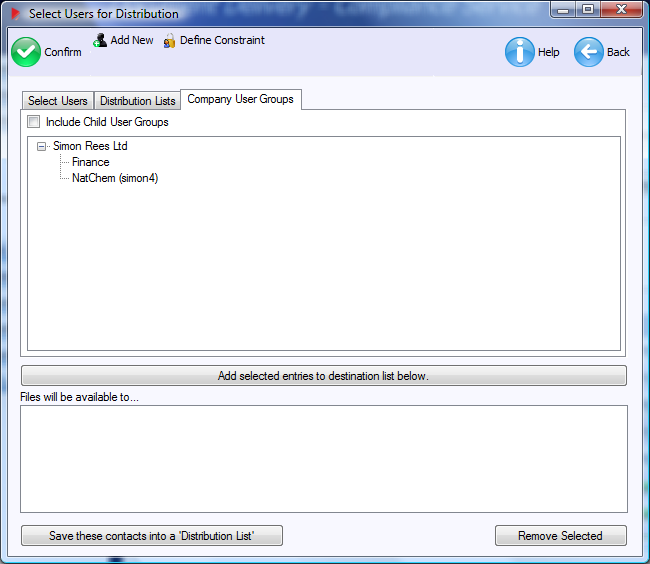
Any distribution lists that you have previously created will appear in the Distribution Lists panel. You can "delete" or "update" the list if you require or simply select it and then "add the entries to the Destination List" using the button. Click on the "Company Area" tab and the following screen will be presented to you that allows you to select any company area (or the top company area which is the entire area) for distribution of the document/file.
Any company area that you have previously created will appear in the company areas panel. Simply select it and then "add the entries to the Destination List" using the button.
restrictions
The
restrictions icon
For full details on restrictions and their use please refer to the help screen specifically referring to restrictions.
Clicking the OK icon
|
|
|
REACH Delivery Service Copyright © All rights reserved. |
Additional Support: Contact REACH Delivery Support Marketing and Sales: Contact REACH Delivery |